Tag: MCP

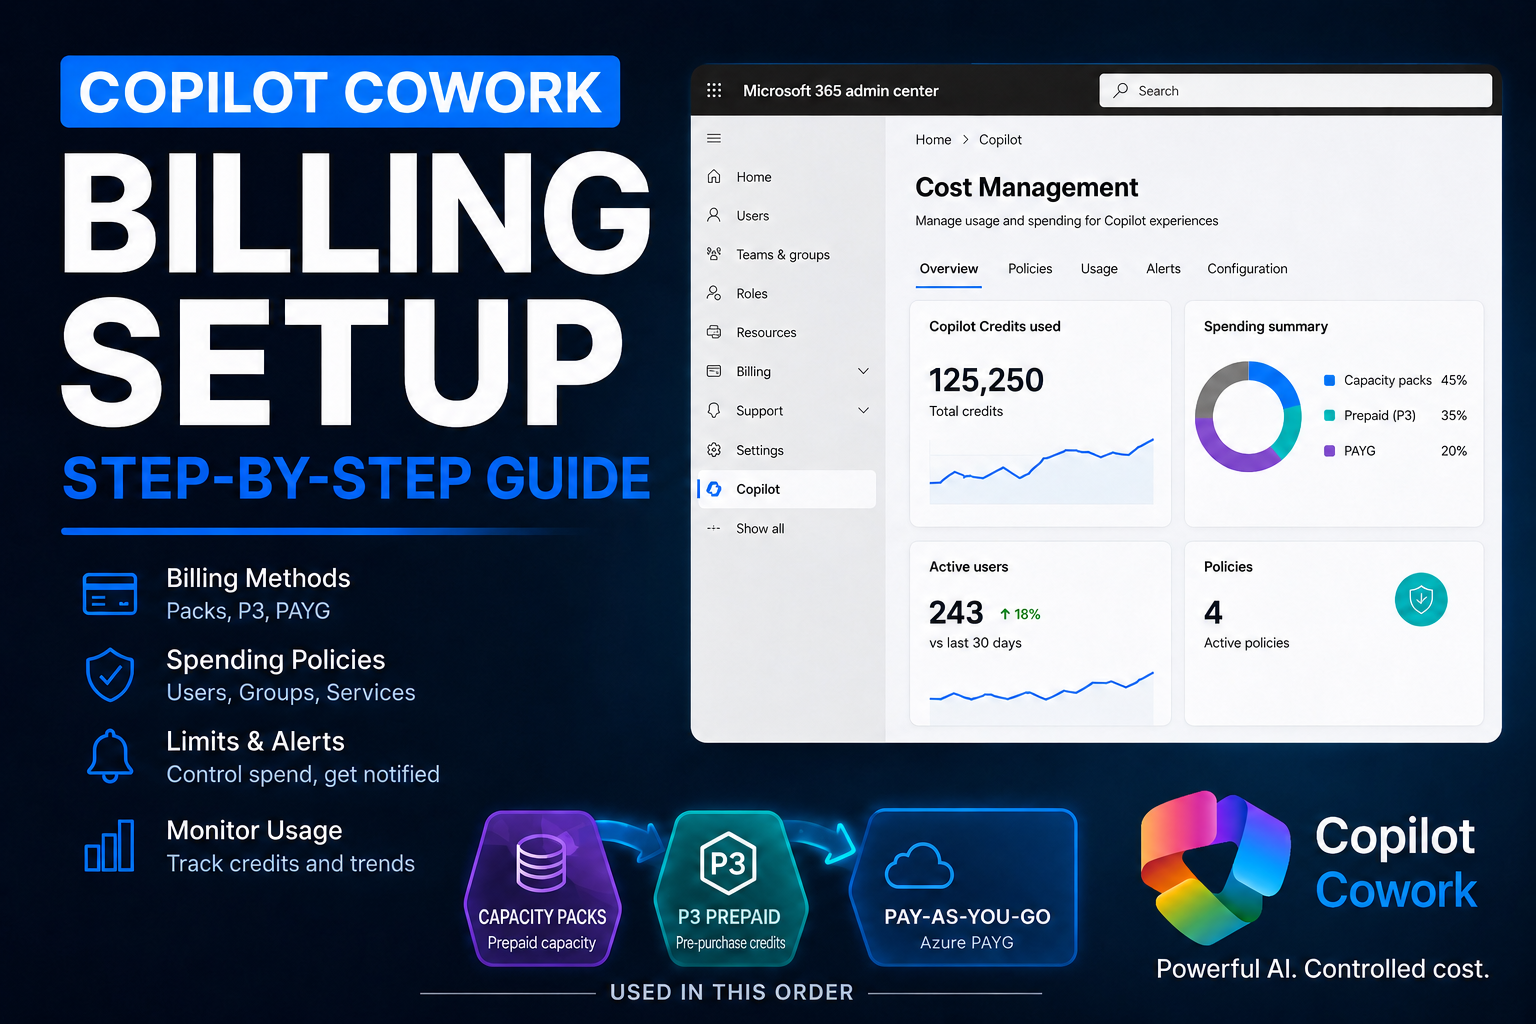
  • Copilot Cowork Billing Setup: Turn On GA Without Opening the Credit Floodgates

    Copilot Cowork Billing Setup: Turn On GA Without Opening the Credit Floodgates

    Copilot Cowork is generally available.

    That is the headline.

    But before you run into the tenant, turn everything on, and let users start throwing goals and long-running tasks at it, you need to understand the billing side.

    Copilot Cowork runs on Copilot Credits. That means the admin work is not just, “Can the user access it?” It is also, “Who can spend credits, how much can they spend, which billing method gets charged, and who gets warned before usage goes sideways?”

    Turning Copilot Cowork on is easy. Turning it on responsibly is where the real admin work starts.

    In this walkthrough, I am setting up Copilot Cowork billing from the Microsoft 365 admin center and showing the choices I would pay attention to before giving users access.

    What changed with Copilot Cowork GA

    Microsoft announced Copilot Cowork general availability on June 16, 2026. Cowork requires a Microsoft 365 Copilot user subscription license, and Cowork usage is billed separately on a usage basis using Copilot Credits.

    That matters because Copilot Cowork is not just another chat surface. It is designed for complex, long-running, multi-tool work. It can retrieve context, call tools, use models, create artifacts, and keep working through a task. All of that value has a meter behind it.

    Microsoft’s current Cost Management experience for usage-based billing applies to Copilot Cowork and Work IQ API right now, with more agents and services expected to come into that experience over time.

    Microsoft 365 admin center Cost management page showing Copilot Cowork and Work IQ API usage-based billing
    Cost Management in the Microsoft 365 admin center is where Copilot Cowork and Work IQ API usage-based billing is configured.

    Start with the right mental model

    Access and consumption are two different things.

    Access lets a user get into the experience. Consumption happens when the experience starts doing work. If Cowork runs a goal, uses a model, retrieves context, calls tools, or performs longer-running work, that activity can consume Copilot Credits.

    That is why billing policies matter. Without them, you are basically handing out an AI gas card and hoping the bill looks reasonable at the end of the month.

    That is not a strategy.

    The better approach is billing plus governance. Set the billing method, define the spending policy, decide who is in scope, add limits, configure alerts, and then expand once you understand real usage.

    Check your admin roles before you start

    If you do not see the option in the admin center, check your role first.

    Billing setup and policy governance may not be handled by the same person in a real organization. Your Microsoft 365 admin, AI admin, Power Platform admin, billing admin, and finance owner might all be different people.

    That matters because the person configuring the billing method needs the right permissions, and the person managing policy limits and alerts also needs the right permissions. Do not discover that halfway through the rollout call. Get the right people in the room before you begin.

    Choose the billing method intentionally

    In the setup flow, you may see more than one billing method. In my tenant example, I had Capacity Packs available and also had the option to use a pay-as-you-go subscription.

    Capacity Packs let you bill against prepaid Copilot Credit capacity. Pay-as-you-go can keep services running once capacity pack credits run out, but it also means the meter can keep running against the connected subscription.

    Neither option is automatically good or bad. The point is to make the choice on purpose.

    Billing method options for Copilot Credits showing Capacity Packs and pay-as-you-go subscription
    Select the billing method intentionally. Capacity Packs and pay-as-you-go behave differently when credits run out.

    For a personal tenant or a controlled pilot, I would usually start with the most bounded option. For a production rollout where interruption would be a problem, you may choose to include pay-as-you-go, but that decision should involve the billing owner.

    What if you have no Copilot Credits?

    If your tenant does not already have Copilot Credits available, do not let that push you into an unlimited rollout. Start with pay-as-you-go, but treat it like a metered pilot, not an open tab.

    Microsoft lists PayGo for Copilot Cowork at $0.01 per Copilot Credit. That means 25,000 credits would be about $250 if you let usage land entirely on pay-as-you-go.

    That is the point where the economics should make you stop and re-check the licensing path. Microsoft lists Copilot Studio credit packs at 25,000 Copilot Credits for $200 per pack per month. So if you expect usage to get anywhere near 25,000 credits in a month, PAYG is no longer just a convenient starter option. It may be more expensive than buying a capacity pack.

    The practical setup I would use is this: enable PAYG to get started, set the monthly policy limit at 25,000 credits, turn alerts on well before that point, and review usage before the policy hits the cap.

    • At 10,000 credits, check whether the pilot group is using Cowork the way you expected.
    • At 20,000 credits, start the capacity pack conversation because the $200 pack economics are already close.
    • At 25,000 credits, do not just increase the PAYG limit without a decision. Buy a P3 or Copilot Credit capacity pack if monthly usage is becoming predictable.

    PAYG is still useful. It is the fastest way to start when you have no credits, and it is a good safety net for overages. But once usage becomes steady, capacity packs are the cleaner budgeting conversation.

    Do not assume the visible credit pool is unused

    This is the part admins need to slow down on.

    In my example, the Cost Management setup showed 50,000 credits available. But in the Power Platform admin center, 10,000 of those Copilot Studio messages were already allocated to a specific environment.

    Power Platform admin center Capacity add-ons page showing Microsoft Copilot Studio messages allocated from a 50,000 credit pool
    Before assigning a Cowork policy, check whether Copilot Credits are already supporting other Power Platform or Copilot Studio workloads.

    The lesson is simple: do not treat the number in one setup panel as the whole story.

    Copilot Credits can support more than one AI workload. If your organization is already using Copilot Studio, Dynamics 365, Power Platform, or other metered AI capabilities, make sure you understand what that credit pool is already expected to cover.

    The last thing you want is for a Cowork pilot to burn through credits that another production agent was relying on.

    Do not start unlimited

    The setup flow gives you the choice to limit monthly spending or leave monthly spending unlimited.

    My recommendation for most organizations starting with Copilot Cowork is simple: do not start unlimited.

    Launch it like a controlled pilot. Give it a monthly policy budget, watch usage, learn what normal looks like, then increase the limit later if the usage is healthy.

    In my example, I set the policy budget to 40,000 credits because I wanted to keep 10,000 credits available for other Copilot Studio usage in the tenant. Your number will be different. The principle is the same.

    Set a per-user monthly limit

    The per-user monthly spending limit is optional, but I would seriously consider enabling it.

    Without a user limit, one person can potentially consume a large chunk of the available credits. They may not be doing anything malicious. They might just be experimenting, running long tasks, testing browser automation, asking for big research outputs, or sending Cowork work that should have stayed in regular Copilot Chat.

    That kind of experimentation is a sign adoption is happening. But adoption without guardrails becomes waste.

    Set a policy-level monthly budget, consider a per-user monthly limit, and configure alerts before activating the policy.

    In the demo tenant, I used a 40,000 credit policy limit and a 20,000 credit per-user limit because the pilot only had two users. That is an example, not a universal recommendation.

    The right number depends on how many users are in scope, what tasks they will run, how much existing Copilot Credit capacity is already committed, and how much risk you are willing to tolerate during the first rollout.

    Turn alerts on before usage surprises you

    Do not wait until the end of the month to learn usage went sideways.

    Cost Management lets you define alerts so the right people get notified when usage reaches a threshold. That could be the Microsoft 365 admin, billing owner, finance stakeholder, platform owner, or whoever is accountable for the pilot.

    In my example, with a 40,000 credit monthly policy limit, I used a 30,000 credit alert threshold. That gives the owner time to investigate before the policy hits the cap.

    This is how you move from reactive admin to proactive admin.

    Do not activate for everyone by default

    This is the part of the setup that is easy to rush.

    If you activate broadly, you may be enabling access across the whole organization depending on how the policy is configured. For some organizations, that might be fine. For most first rollouts, I would not start there.

    Customize the setup configuration and scope the policy to a security group.

    Microsoft 365 admin center security group creation screen with the name Copilot Cowork Access
    Create a clear security group for the pilot, such as Copilot Cowork Access, instead of starting with the entire tenant.

    Use a clear name like Copilot Cowork Access or Copilot Cowork Pilot Users. Add a small group of trusted users first: admins, builders, business champions, finance, operations, or the people who will give you useful feedback.

    Think of this like a pilot program. You want people who will use it seriously, report what worked, report what wasted credits, and help you understand whether the budget is realistic.

    Cost Management access group configuration scoped to specific security groups
    Scope the policy to specific groups so you know exactly who can consume Copilot Credits through Cowork.

    Review the policy before you activate it

    Before clicking activate, review the setup like a change request:

    • Which services are enabled by the policy?
    • Which billing method will be charged?
    • Is the monthly spending limit set?
    • Is the per-user limit set?
    • Who receives alerts?
    • What threshold triggers those alerts?
    • Which users or groups are in scope?
    • Are other workloads already using the same credit pool?

    In my setup, the final shape was:

    • Billing method: Capacity Packs
    • Policy monthly limit: 40,000 credits
    • Per-user monthly limit: 20,000 credits
    • Alert threshold: 30,000 credits
    • Access scope: a specific security group for Copilot Cowork access

    Again, those are demo values. Do not copy them blindly. Copy the pattern: limit, alert, scope, observe, then scale.

    The rollout pattern I would use

    If I were rolling out Copilot Cowork in a tenant, I would not start with the whole organization. I would use this pattern:

    1. Confirm the admin roles needed for billing and policy management.
    2. Review existing Copilot Credit usage in Microsoft 365 and Power Platform.
    3. Choose the billing method with the billing owner involved.
    4. Create a bounded monthly spending policy.
    5. Add a per-user limit for the pilot group.
    6. Set alerts before the policy limit is reached.
    7. Create a security group for pilot access.
    8. Add a small number of serious users.
    9. Monitor usage and identify what tasks burn credits.
    10. Increase limits or expand access only after you understand normal usage.

    This gives you control. You know who has access, what they can consume, which budget they are under, and when someone needs to pay attention.

    That is how you test Copilot Cowork without turning the tenant into a free-for-all.

    Final thought

    Copilot Cowork is powerful because it can take on real work. But the more real the work gets, the more important the admin controls become.

    Cost Management is not the boring part of Copilot Cowork. It is the part that lets you adopt it without surprising finance, burning shared credits, or giving every user an unlimited meter on day one.

    Start controlled. Learn the usage. Then scale with confidence.

    Sources

  • Copilot Cowork Dataverse Plugin Setup

    Copilot Cowork Dataverse Plugin Setup

    I finally got Dataverse MCP working inside Copilot Cowork as a custom plugin.

    This guide walks through the setup in a way I wish I had when I started.

    The goal is simple:

    • Register an app in Entra
    • Enable Dataverse MCP for your Power Platform environment
    • Create the OAuth registration in Teams Developer Portal
    • Build a Copilot Cowork plugin that points to your Dataverse MCP endpoint
    • Deploy it
    • Give Cowork enough schema context to understand your Dataverse tables

    If you are a low-code builder, the confusing part is not Dataverse.

    The confusing part is the setup across multiple portals.

    You will touch Entra, Power Platform admin center, Teams Developer Portal, the plugin manifest, and Copilot Cowork.

    That sounds worse than it is. You just need to know which value goes where.

    I have a video going over the same steps as the blog:

    1. What we are building
    2. Before you start
    3. The setup order
    4. Step 1: Create the App Registration
      1. Add the Dataverse MCP permission
      2. Add the redirect URI
    5. Step 2: Configure the Power Platform environment
      1. Add the allowed MCP client
      2. Capture the Dataverse URL
    6. Step 3: Create the OAuth registration in Teams Developer Portal
      1. Base URL
      2. Authorization endpoint
      3. Token endpoint
      4. Scope
      5. Client ID and secret
    7. Step 4: Build the plugin
      1. Import Plugin Builder skill
      2. Build Dataverse Plugin with Template
    8. Step 5: Deploy the plugin
      1. Connect Plugin
    9. Step 6: Create a schema-aware skill
    10. Step 7: Test with a real scenario
    11. Example prompts:
      1. List records
      2. Add records
      3. Details on a record
      4. Build Dashboard
      5. Create report
      6. Send Email with context
      7. Create PPT with context + Brand
    12. Common mistakes
      1. Mistake 1: Mixing up the IDs
      2. Mistake 2: Wrong MCP URL
      3. Mistake 3: Wrong OAuth scope
      4. Mistake 4: Testing with a user that cannot access the data
      5. Mistake 5: Re-uploading the same version
    13. Download the checklist
    14. Official docs
    15. Final take

    What we are building

    We are building a Copilot Cowork plugin that connects to the Dataverse MCP endpoint.

    Once installed, Cowork can use that plugin to query Dataverse through MCP.

    The basic flow looks like this:

    1. User asks Copilot Cowork a question
    2. Cowork uses the custom plugin
    3. The plugin points to the Dataverse MCP endpoint
    4. Dataverse returns the data
    5. Cowork uses schema guidance to make sense of the tables
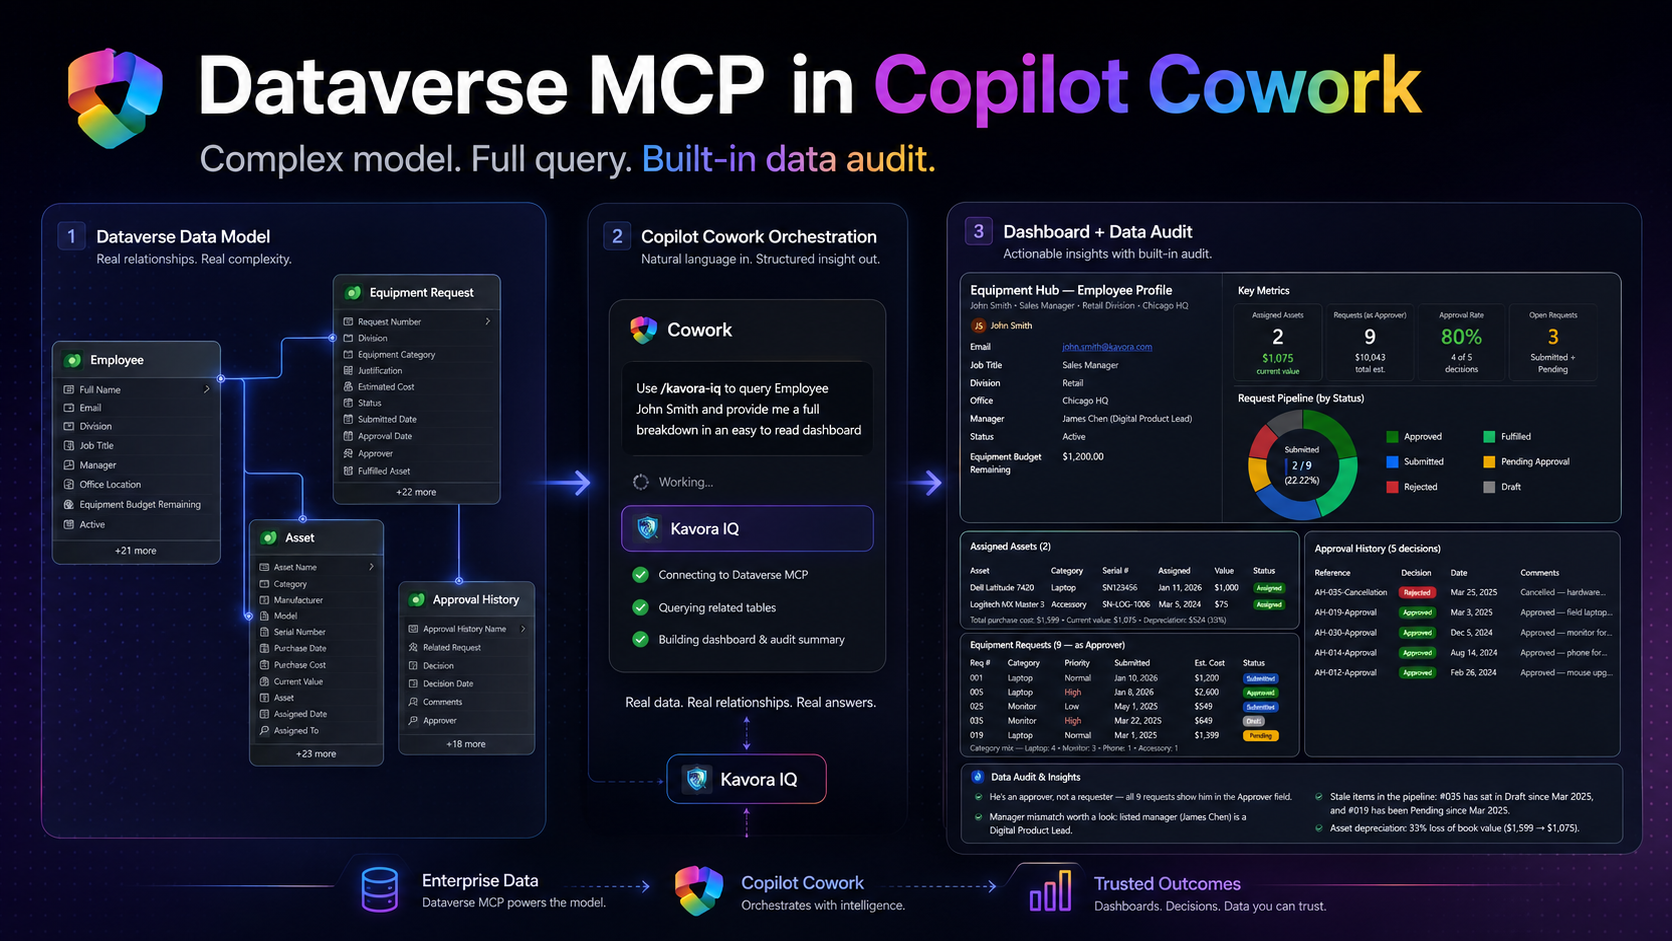
    6. Cowork returns a useful answer, summary, dashboard, or audit notes

    I recommend keeping this setup in two parts:

    • The plugin: gives Cowork access to the Dataverse MCP connector
    • The schema skill: tells Cowork which Dataverse tables, columns, relationships, and rules matter

    That split makes the setup easier to maintain.

    If your schema changes, you can update the schema skill without rebuilding and redeploying the entire plugin package.

    Before you start

    You will need:

    I created a checklist for this because the setup has a few values that are easy to mix up.

    The setup order

    This is the order I recommend:

    1. Create the App Registration
    2. Configure the Power Platform environment
    3. Create the OAuth registration in Developer Portal
    4. Build the plugin
    5. Deploy the plugin
    6. Create the schema skill
    7. Test everything in Copilot Cowork

    Do not start with the plugin manifest.

    Get the identity, environment, and OAuth pieces ready first. The manifest is much easier once you already have the right values.

    Step 1: Create the App Registration

    Start in Microsoft Entra.
    https://entra.microsoft.com/

    Create an app registration that will be used for the Dataverse MCP connection.

    Capture these values:

    • Tenant ID
    • Application / Client ID
    • Client secret
    • Secret expiry date

    You will use the Client ID more than once, so copy it somewhere safe.

    Add the Dataverse MCP permission

    In the app registration, add the required API permission for Dataverse MCP.

    1. Open the app registration
    2. Go to API permissions
    3. Select Add a permission
    4. Select Microsoft APIs
    5. Select Dynamics CRM
    6. Add the permission:
    mcp.tools

    Grant admin consent if your tenant requires it.

    Add the redirect URI

    1. For the OAuth flow, add this redirect URI if your setup requires it:
    https://teams.microsoft.com/api/platform/v1.0/oAuthRedirect

    Important: the Application / Client ID is not the same as the OAuth registration ID you will create later.

    Keep those two values separate.

    Step 2: Configure the Power Platform environment

    Next, configure the Power Platform environment that contains your Dataverse data.

    You need the Dataverse environment to allow MCP clients.

    Open Power Platform admin center and go to the target environment.

    1. Open Power Platform admin center
    2. Go to Manage
    3. Select Environments
    4. Open your target environment
    5. Open Settings
    6. Go to Product
    7. Open Features
    8. Find the Dataverse MCP setting
    9. Allow MCP clients to interact with Dataverse MCP server
    10. Only check the GA version of the MCP server > Click Save

    The exact wording may change because this area is still moving, but the goal is the same: allow MCP clients for that environment

    Add the allowed MCP client

    Now add your Entra Application / Client ID as an allowed MCP client for the environment.

    1. Click “Go to Advanced Settings” link under Step 2
    2. Click +New > fill in the details like this:
      – Name: Cowork Dataverse MCP – <env name>
      – Unique Name: new_CoworkDataverseMCP<envName>
      – Application Id: Paste your application Id from the App Registration you created in section 1
      – Is Enabled: Yes
    3. Click Save & Close

    That part matters.

    The value you add here is the Entra Application / Client ID.

    Also make sure the allowed MCP client is enabled.

    If this step is wrong, the plugin can look fine but still fail when Cowork tries to use Dataverse.

    Before leaving the admin center, grab the Environment URL.

    Capture the Dataverse URL

    You need your Dataverse Org URL

    It looks like this:

    https://yourorg.crm.dynamics.com

    The MCP server URL is the same URL with /api/mcp added to the end.

    https://yourorg.crm.dynamics.com/api/mcp

    Step 3: Create the OAuth registration in Teams Developer Portal

    Now open Teams Developer Portal.
    ( https://dev.teams.microsoft.com/ )

    Create an OAuth client registration for the plugin.

    This registration stores the OAuth configuration and gives you the OAuth registration ID that your plugin manifest will reference.

    In the OAuth registration, you will enter values from the Entra app and your Dataverse environment.

    1. Click Tools > OAuth client registration
    2. + New OAuth client registration

    Base URL

    Use your Power Platform Environment URL

    https://<yourorg>.crm.dynamics.com

    Restrict usage by Teams app: select Any Teams app (for now, since we don’t have a Teams app ID yet)

    Authorization endpoint

    Use your Tenant ID in this format:

    https://login.microsoftonline.com/{tenantId}/oauth2/v2.0/authorize

    Token endpoint

    Use your Tenant ID in this format:

    https://login.microsoftonline.com/{tenantId}/oauth2/v2.0/token

    Scope

    The scope should use your Dataverse Org URL.

    Use this format:

    https://yourorg.crm.dynamics.com/.default offline_access

    Example:

    https://kavoracrm.crm.dynamics.com/.default offline_access

    Client ID and secret

    Use the Client ID and secret from the Entra app registration you created earlier.

    After saving the OAuth registration, copy the OAuth registration ID.

    You will use that value in the plugin manifest as the connector referenceId.

    Important: the OAuth registration ID goes into the plugin manifest.

    Step 4: Build the plugin

    For this approach, the plugin should stay focused on the Dataverse MCP connector.

    To make this even easier, I created a Cowork-Plugin skill to assist in building the Plugin with a template.

    Import Plugin Builder skill

    1. Download my /cowork-plugin-builder skill
    2. In Copilot Cowork > attach the skill and prompt: Add this skill
    3. After import refresh your browser

    Build Dataverse Plugin with Template

    We will use the skill you just imported to help build the plugin.

    1. Inside Copilot Cowork craft a prompt and add the cowork-plugin-builder skill
    2. Add these details or Copilot Cowork will ask you for these values
      (NOTE: If your using the Checklist app I created to track progress, click the Copy setup summary. Paste this into the prompt as well)

    Prompt to use:

    /cowork-plugin-builder to build a Dataverse plugin using this template:‌
    Organization name:
    Connector display name:
    description:
    Tenant ID:
    Client ID:
    Org URL:
    MCP URL:
    OAuth registration ID:
    OAuth scope:
    Connector referenceId:

    Fill in everything you can.

    I created a Dataverse-style icon with a Cowork badge so the plugin is easy to recognize when it appears in Cowork.
    (Included in the template)

    When Copilot Cowork is done, you should receive a zip file.

    Download the zip file.

    Step 5: Deploy the plugin

    After the package is ready, deploy it to a test user or test group first.

    1. M365 Admin Center > Agents > All agents > Upload custom app > pick dataverse-<pluginname>.zip
    2. Publish to users: add yourself first
    3. Install (optional): add yourself so it auto-appears
    4. Accept permissions > Review & finish
    • Apply Template (default should be fine)
    • Review Permissions (should be none, since permissions are done through the App registration)
    • Publish

    Keep the first deployment small.

    Connect Plugin

    1. Open a fresh Copilot Cowork session
    2. Click + > Manage Plugins
    3. Click … Browse Plugins
    4. Find the Plugin > Click Add
    5. Scroll down and click Connect

    Start with a simple prompt like this:

    Use the <Plugin name> to confirm you can access the Dataverse MCP server.

    Important: when you change the plugin package, update the version before uploading again.

    Also start a fresh Cowork session after deployment changes.

    Otherwise, you can end up testing against a stale session and thinking the plugin is broken.

    Step 6: Create a schema-aware skill

    This is the step that makes the plugin more useful.

    The plugin gives Cowork access to Dataverse.

    The schema skill helps Cowork understand what to do with that access.

    In the schema skill, give Cowork the details it needs to query your model properly.

    • Table logical names
    • Table purpose
    • Primary columns
    • Lookup columns
    • Relationships between tables
    • Status fields
    • Rules for what matters
    • Data-quality checks
    • Example prompts

    We can use this skill to create a personal skill to query certain tables, etc.

    In the example, I ask Copilot Cowork what tables are used in a certain Model-Driven App.
    Prompt:

    What tables are apart of Kavora Equipment Hub
    /dataverse-schema-

    Copilot Cowork responds with a tables and logical names.
    Next I ask for all the logical columns for those tables.
    (NOTE: This will help Copilot Cowork query your data quicker)

    My follow-up prompt:

    Yes pull all logical columns.
    I want to build a skill around these tables and data.
    Name the Skill Kavora Equipment IQ

    Then Copilot Cowork drafted the skill for me.
    I reviewed it and said “Looks good”

    Copilot Cowork built the skill

    Step 7: Test with a real scenario

    Now run an actual test.

    Do not only ask Cowork to connect.

    Ask it to use the Dataverse model.

    A good test should include:

    • One known record
    • At least one related table
    • At least one lookup relationship
    • Some output Cowork needs to organize
    • A data-quality check or business rule

    Example prompts:

    List records

    use /<skill you just built>
    List all the <table>

    Add records

    use /<skill you just built>
    can you add 3 more <assets>
    1. Blue Yeti mic, Regional Office, value (you look this up in USD)‌
    2. Red dragon Keyboard (RGB), lookup value, put in the HQ
    3. Surface Arc Mouse, lookup price, put in HQ

    Details on a record

    use /<skill you just built>
    list all the <table> who <condition>

    Build Dashboard

    use /<skill you just built>
    give me a full dashboard of <record>.
    Surface all details relating to <record>

    Create report

    use /<skill you just built>
    now create a report with each <Employee>
    on what they have left VS what they have used for budget

    Send Email with context

    use /<skill you just built>
    Email <James chen> asking about the <assets>

    Create PPT with context + Brand

    (NOTE: the branding is a separate skill not included in the plugin)

    use /<skill you just built>
    Now put this information inside a PPT
    using </branding-skill> for Kavora branding.
    This PPT is for Kavora Executives.
    Make it look polished with graphs and charts and pop.

    This is where the setup starts paying off.

    Cowork can query the data, follow relationships, and return a useful answer instead of forcing you to manually pull everything together.

    Common mistakes

    Mistake 1: Mixing up the IDs

    There are two important IDs:

    • Entra Application / Client ID: used in Power Platform as the allowed MCP client
    • OAuth Registration ID: used in the plugin manifest as the referenceId

    If you paste the wrong one in the wrong place, the setup will fail.

    Mistake 2: Wrong MCP URL

    The MCP URL should look like this:

    https://yourorg.crm.dynamics.com/api/mcp

    Watch for missing /api/mcp.

    Mistake 3: Wrong OAuth scope

    The scope should use your Dataverse Org URL:

    https://yourorg.crm.dynamics.com/.default offline_access

    Mistake 4: Testing with a user that cannot access the data

    Make sure the user testing the plugin has access to the Dataverse tables you are querying.

    Mistake 5: Re-uploading the same version

    If you change the package, update the version number before uploading again.

    Download the checklist

    I built a simple HTML checklist for this setup.

    It lets you track the values, check off steps, auto-fill the scope from your Dataverse URL, and generate the connector snippet.

    Download the Dataverse MCP Connector for Copilot Cowork setup checklist

    Official docs

    Final take

    NOTE: When you have tested and validated you can connect to Dataverse. You will want to add the Teams App ID from the Agent Plugin we deployed and add it to the Teams Developer OAuth Registration.

    1. Go to Teams Admin center > Teams apps > Manage apps
    2. Find your Plugin you deployed > Copy the App ID
    3. Go back to Teams Developer Portal and open the OAuth registration tool that was created
    4. Paste the App ID into the “Restrict usage by Teams app” field as an Existing Teams app

    This setup is still early, and there are rough edges.

    But once it works, the direction is obvious.

    Dataverse already has the business model.

    Copilot Cowork gives users a work surface.

    The MCP connector connects the two.

    Add a schema-aware skill, and Cowork can start working through real Dataverse data in a way that feels practical for actual business scenarios.

    That is the part worth paying attention to.

    Let me know what other Plugins you want to see in Copilot Cowork.

  • Part 2 – Build & Ship a “Docs Agent” to Microsoft Teams

    Part 2 – Build & Ship a “Docs Agent” to Microsoft Teams

    (Companion guide to “Spin-Up the Microsoft Learn MCP Server”)

    Make sure you have read and setup the Docs MCP custom connector from part 1

    1. What you’ll build
    2. Prerequisites
      1. Icons to Download (optional)
    3. 1 – Create the Agent in Copilot Studio
      1. Add Suggested Prompts
      2. Agent Settings
      3. Turn Off Pointless Topics
    4. Publish & Package for Teams
      1. Submit Agent for Approval
    5. Approve Agent App (As a Teams Admin)
    6. How to Use the Agent
      1. Adding Agent to a Meeting or Chat
      2. Troubleshooting

    What you’ll build

    A Copilot Studio agent that queries the Microsoft Learn MCP server for live docs, then answers teammates inside a Teams chat or Meeting.

    Prerequisites

    NeedNotes
    Docs MCP custom connector from Part 1Already in your environment.
    (https://flowaltdelete.ca/2025/06/26/how-to-spin-up-the-microsoft-learn-mcp-server-in-copilot-studio/)
    Copilot Studio (preview) tenantGenerative orchestration enabled. (Early Features)
    Teams admin rights (or approval from your Teams Admin)To upload a custom app or publish to the org.
    Copilot Studio LicenseMessage packs or sessions
    prereq table

    Icons to Download (optional)

    Below are icons you can use for the Agent and the MCP custom connector.

    1 – Create the Agent in Copilot Studio

    In this example I am going to use the existing agent I created from Part 1.

    1. Modify or create the agent with a meaningful name, description, and icon.
      (You can use the one I provided from above or use your own)
    2. Name: MS Docs Agent
    3. Description: MS Docs Agent is your on-demand mentor for Microsoft technologies—built with Copilot Studio and powered by the Microsoft Learn MCP server. Every answer comes from the live, authoritative docs that Microsoft publishes each day, so you never rely on stale model memories or web-scraped content.
    4. Orchestration = Enabled

    5. For your Instructions for the agent, we don’t want to add too much. After much testing I found that in its current state the Docs MCP server handles the instructions well and having too much instructions causes the response to fail. So its better to leave instructions blank for now.
    6. Web Search – This should be Disabled. We only want the agent to query the docs which it does through the MCP server.
    7. Knowledge should be empty, the only thing we want this agent to do is query the Docs MCP server, so this should be the only Tool that the agent has access to.
    8. To recap, the only Tools and Knowledge this agent should have is the MCP Server (custom connector) that we created in the first blog post. If you need help setting this up refer to Part 1.

    Add Suggested Prompts

    When users interact with the agent in M365 chat (Copilot) we can show suggested prompts to help guide the user in what is possible with this agent. Here are a bunch of samples you can give your agent:

    TitlePrompt
    Dev Env for Power AppsSet up a developer environment for Power Apps—step-by-step.
    Rollup vs FormulaRollup fields vs Formula columns in Dataverse—when to use each?
    Flow 502 FixPower Automate flow fails with 502 Bad Gateway—how do I resolve it?
    Cert Path FinderFastest certification path for a Dynamics 365 functional consultant.
    PL-200 Module ListList every Microsoft Learn module covered by the PL-200 exam.
    Managed Env EnableTurn on managed environments and approval gates in Power Platform.
    Finance DLP PolicyBest-practice DLP setup for finance data in Power Platform.
    Power Fx Date FilterSample Power Fx to filter a gallery to today’s records.
    OpenAI Flow SampleMinimal example: call Azure OpenAI from Power Automate.
    Secure Env VarsSecure environment variables with Azure Key Vault in flows.
    Pipeline ChecklistChecklist to deploy a solution through Power Platform pipelines.
    PCF Chart ControlBuild a PCF control that renders a chart on a model-driven form.
    New PA FeaturesSummarize new Power Apps features announced this month.
    Preview ConnectorsList preview connectors added to Power Automate in the last 30 days.
    Explain to a ChildExplain Dataverse to a five-year-old.

    You can only add 6 Suggested Prompts. So choose carefully.

    Agent Settings

    Next we want to configure some settings on the agent.

    1. Click the Settings button on the top right.

    2. (Optional) If you want the agent to have reasoning capabilities > Under Generative AI turn on: Deep reasoning
      **Note that this is a premium feature**

    3. Scroll down to Knowledge, make sure Use general knowledge and Use information from the Web are both OFF

    4. Make sure to click Save once done.

    Turn Off Pointless Topics

    Next we will turn off the topics we don’t want the agent to use.

    1. Click on Topics tab > Under Custom > Only leave Start Over topic On.

    2. Under System > Turn Off:
      – End of Conversation
      – Escalate
      – Fallback
      – Multiple Topics Matched

    3. Next, lets modify the Conversation Start to make it sound better.
      Click Conversation Start topic > Modify the Message node:

    4. Click Save.

    Now we are ready to Publish and Package for Teams!

    Publish & Package for Teams

    Next we need to Publish our agent.

    1. Click on the Channels tab > Click Publish

    2. Once your agent is published > Click on the Teams and Microsoft 365 Copilot channel.

    3. A sidebar opens > Check the Make agent available in Microsoft 365 Copilot > Click Add channel.

    4. After the channel has been added > Click Edit details.

    5. This is where we configure the agent in Teams. We will modify the icon, give a short description, long description and allow for the agent to be added to a team and meeting chats.
      Under Teams settings > Check both:
      Users can add this agent to a team
      Use this agent for group and meeting chats

    6. Click Save

    Submit Agent for Approval

    Now because we want our organization to easily find and use this agent. We will submit the agent to the Agent Store. To do this follow these steps:

    1. First Publish your agent, to make sure you have the newest version you are pushing to Teams admin for approval.
    2. Next click on the Channels tab > Select the Teams and Microsoft 365 Copilot channel.
    3. Now click Availability options.

    4. Now we will configure the Show to everyone in my org.

    5. Than click Submit for admin approval.

      Now we will look at what a Teams Admin has to do.

    Approve Agent App (As a Teams Admin)

    A Microsoft Teams Admin will have to approve the Agent app before your org can use it. As a Teams Admin follow these steps:

    1. Navigate to https://admin.teams.microsoft.com/policies/manage-apps
      (Click on Manage apps under Teams apps)
    2. Search for your agent name in the search bar

    3. Click the agent > Publish.

    4. Note:: You will need Admin Approval each time you want to publish an update to the agent.

    How to Use the Agent

    Once your agent is approved by an Admin. You can easily find it in the Agent Store. Another easy way to get to your agent is to open it from Copilot Studio:

    1. Click Channels tab > Select Teams and Microsoft 365 Copilot channel > Click See agent in Teams.

    You will be brought to Teams with the agent open. You can now add it:

    Adding Agent to a Meeting or Chat

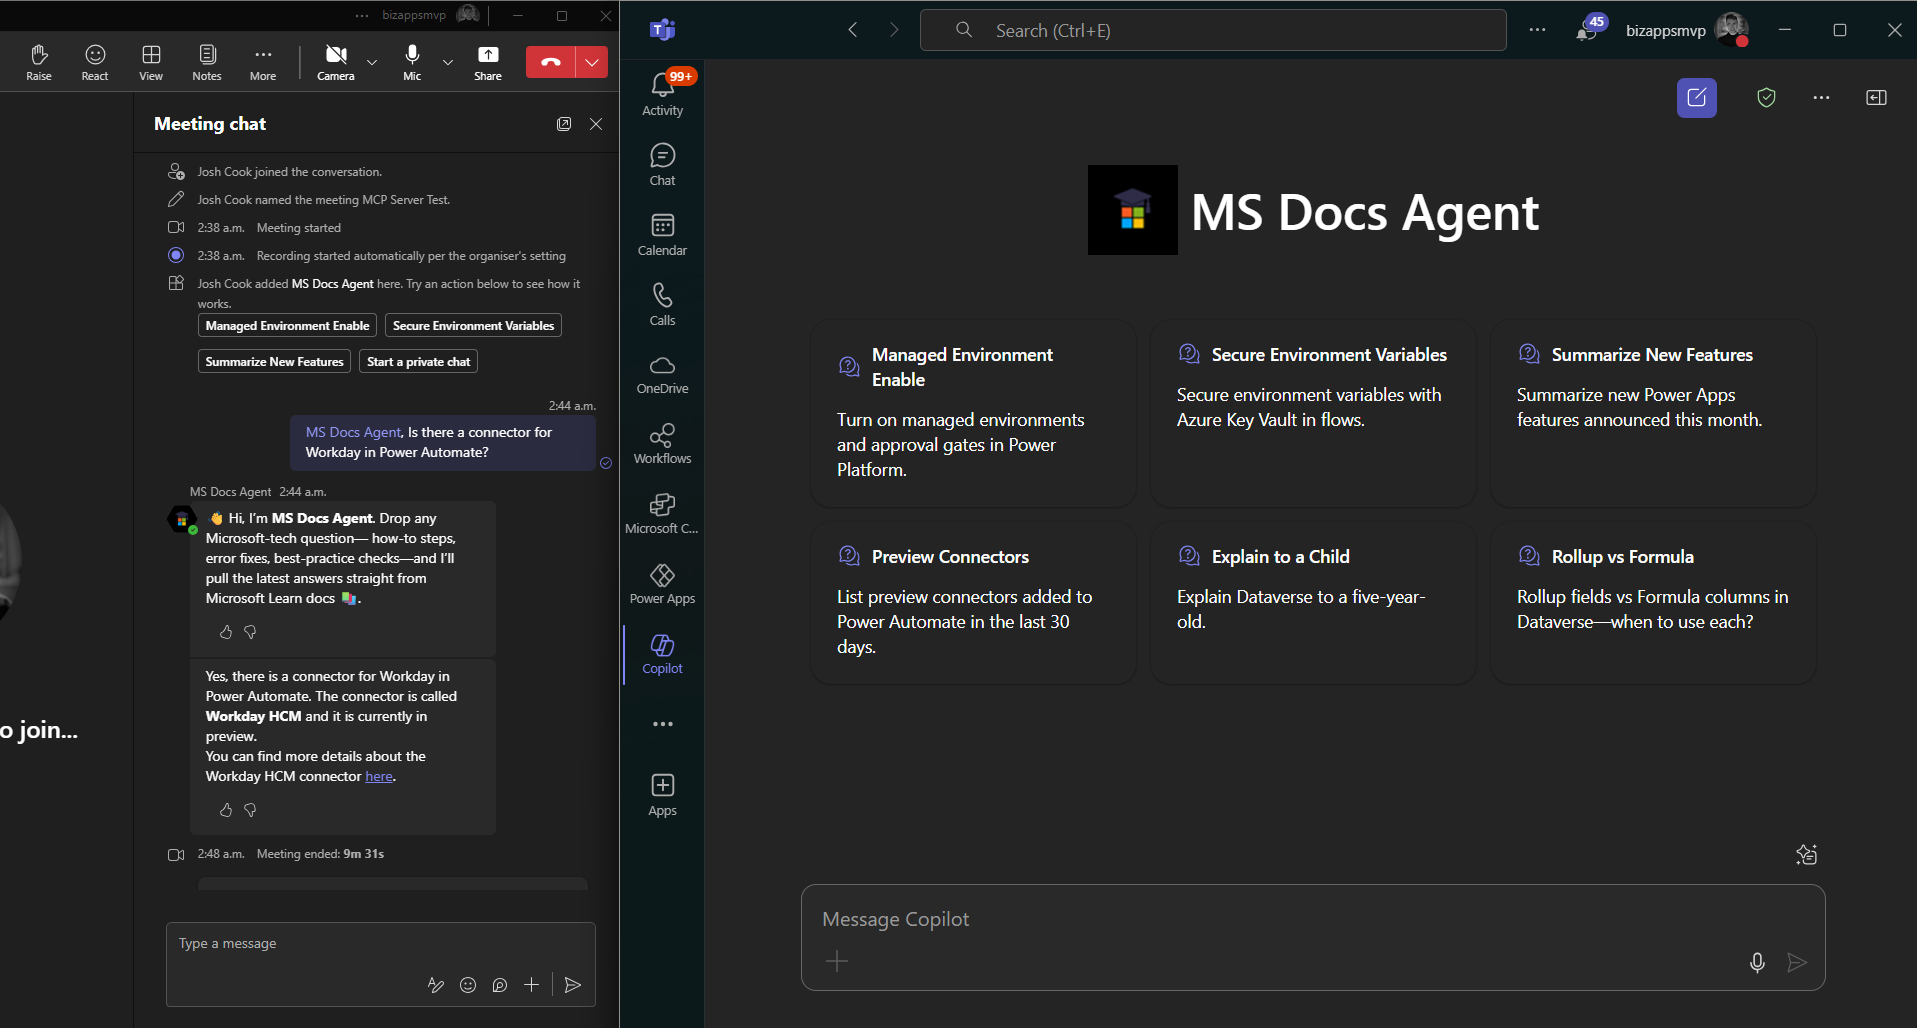
    There are a few ways to add the agent to a meeting. One easy way is to @mention the agent in the chat.

    **Note to start typing the name of the agent, and it should show up**

    Troubleshooting

    There are a few things to note that I ran into:
    1) If your getting an error on the MCP Server, remove all custom instructions

    2) Sometimes your agents details can be cached and showing old metadata. In this case you can resubmit the app approval.

    3) Always test the Agent inside Copilot Studio Test Pane with tracking topics and Activity Map turned On.

  • Add the Microsoft Learn Docs MCP Server in Copilot Studio

    Add the Microsoft Learn Docs MCP Server in Copilot Studio

    UPDATE—August 8, 2025: You no longer need to create a custom connector for the Microsoft Learn Docs MCP server. Copilot Studio now includes a native Microsoft Learn Docs MCP Server under Add tool → Model Context Protocol.
    This guide has been updated to show the first-party path. If your tenant doesn’t yet show the native tile, use the Legacy approach at the bottom.

    What changed

    • No YAML or custom connector required
    • Fewer steps, faster setup

    Model Context Protocol (MCP) is the universal “USB-C” port for AI agents. It standardizes how a model discovers tools, streams data, and fires off actions—no bespoke SDKs, no brittle scraping. Add an MCP server and your agent instantly inherits whatever resources, tools, and prompts that server exposes, auto-updating as the backend evolves.

    1. Why you should care
    2. What the Microsoft Learn Docs MCP Server delivers
    3. Prerequisites
    4. Step 1 – Add the native Microsoft Learn Docs MCP Server
    5. Step 2 – Validate
    6. Legacy approach (if the native tile isn’t available)

    Why you should care

    • Zero-integration overhead – connect in a click inside Copilot Studio or VS Code; the protocol handles tool discovery and auth.
    • Future-proof – the spec just hit GA and already ships in Microsoft, GitHub, and open-source stacks.
    • Hallucination killer – answers are grounded in authoritative servers rather than fuzzy internet guesses.

    What the Microsoft Learn Docs MCP Server delivers

    • Tools: microsoft_docs_search – fire a plain-English query and stream back markdown-ready excerpts, links, and code snippets from official docs.
    • Always current – pulls live content from Learn, so your agent cites the newest releases and preview APIs automatically.
    • First-party & fast — add it in seconds from the Model Context Protocol gallery; no OpenAPI import needed.

    Bottom line: MCP turns documentation (or any backend) into a first-class superpower for your agents—and the Learn Docs server is the showcase. Connect once, answer everything.

    Prerequisites

    • Copilot Studio environment with Generative Orchestration (might need early features on)
    • Environment-maker rights
    • Outbound HTTPS to learn.microsoft.com/api/mcp

    Step 1 – Add the native Microsoft Learn Docs MCP Server

    1. Go to Copilot Studio: https://copilotstudio.microsoft.com/
    2. Go to Tools → Add tool.
    3. Select the Model Context Protocol pill.
    4. Click Microsoft Learn Docs MCP Server.
    5. Choose the connection (usually automatic) and click Add to agent.
    6. Confirm the connection status is Connected.
    Copilot Studio Add tool panel showing Model Context Protocol category and Microsoft Learn Docs MCP Server tile highlighted.
    1. The MCP server should now show up in Tools.
    1. Click the Server to verify the tool(s) and to make sure:
      – ✅ Allow agent to decide dynamically when to use this tool
      – Ask the end user before running = No
      – Credentials to use = End user credentials

    Step 2 – Validate

    1. In the Test your agent pane. Turn on Activity map by clicking the wavy map icon:

    2. Now try a prompt like:
      What MS certs should I look at for Power Platform?
      How can I extend the Power Platform CoE Starter Kit?
      What modern controls in Power Apps are GA and which are still in preview? Format as a table

    Use-Case Ideas

    • Internal help-desk bot that cites docs.
    • Learning-path recommender (your pipeline example).
    • Governance bot that checks best-practice-links.

    Troubleshooting Cheat-Sheet

    • Note that currently the Learn Docs MCP server does NOT require authentication. This will most likely change in the future.
    • If Model Context Protocol is not shown in your Tools for Copilot Studio. You may need to create an environment with Early Features turned on.
    • Do NOT reference the MCP server in the agents instructions, you will get a tool error.
    • Check Activity tab for monitoring

    Legacy approach (if the native tile isn’t available)

    Grab the Minimal YAML

    1. Open your favorite code editor or notepad. Copy and paste this YAML to a new file.
    swagger: '2.0'
    info:
      title: Microsoft Docs MCP
      description: Streams Microsoft official documentation to AI agents via Model Context Protocol
      version: 1.0.0
    host: learn.microsoft.com
    basePath: /api
    schemes:
      - https
    paths:
      /mcp:
        post:
          summary: Invoke Microsoft Docs MCP server
          x-ms-agentic-protocol: mcp-streamable-1.0
          operationId: InvokeDocsMcp
          consumes:
            - application/json
          produces:
            - application/json
          responses:
            '200':
              description: Success
    
    1. Save the file with .yaml extension.

    Import a Custom Connector

    Next we need to create a custom connector for the MCP server to connect to. We will do this by importing our yaml file we created in Step 1.

    1. Go to make.powerapps.com > Custom connectors > + New custom connector > Import OpenAPI.

    2. Upload your yaml file eg: ms-docs‑mcp.yaml, using the Import an OpenAPI file option.

    3. General tab: Confirm Host and Base URL.
      Host: learn.microsoft.com
      Base URL: /api
    4. Security tab > No authentication (the Docs MCP server is anonymously readable today).
    5. Definition tab > verify one action named InvokeDocsMcp is present.
      Also add a description.

    6. Click Create connector. Once the connector is created, click the Test tab, and click +New Connection.

      (Note, you may see more than 1 Operation after creating the connector. Don’t worry and continue on)
    7. When you create a connection, you will be navigated away from your custom connector. Verify your Connection is in Connected Status.

      Next we will wire this up to our Agent in Copilot Studio.