Controlling when your Flow triggers can be crucial. By default Flows run in Parallel, this means multiple runs could be running at the same time, this is great for performance, but could cause troubles in some Flows. For example:
Lets say we have a Flow setup that is triggered on when an item in a SharePoint list is created, which gets sent to other systems for different purposes. For data quality reasons, we only want the Flow to run one at a time, and have other runs be waiting in a queue.
The Flow
The only setting we need to change is in our Trigger.
This can be done on Triggers other than SharePoint
For this demo, I added a Compose action to get the Name of the item being created in SharePoint.
I added a Delay action only to show what happens if multiple runs queue up.
The setting we want to change is in the trigger, click the 3 dots on the trigger and select Settings from the drop down.
Now inside Settings, find and enable Concurrency Control, and set Degree of Parallelism to 1. This setting is how many runs can run in at one time. Click Done
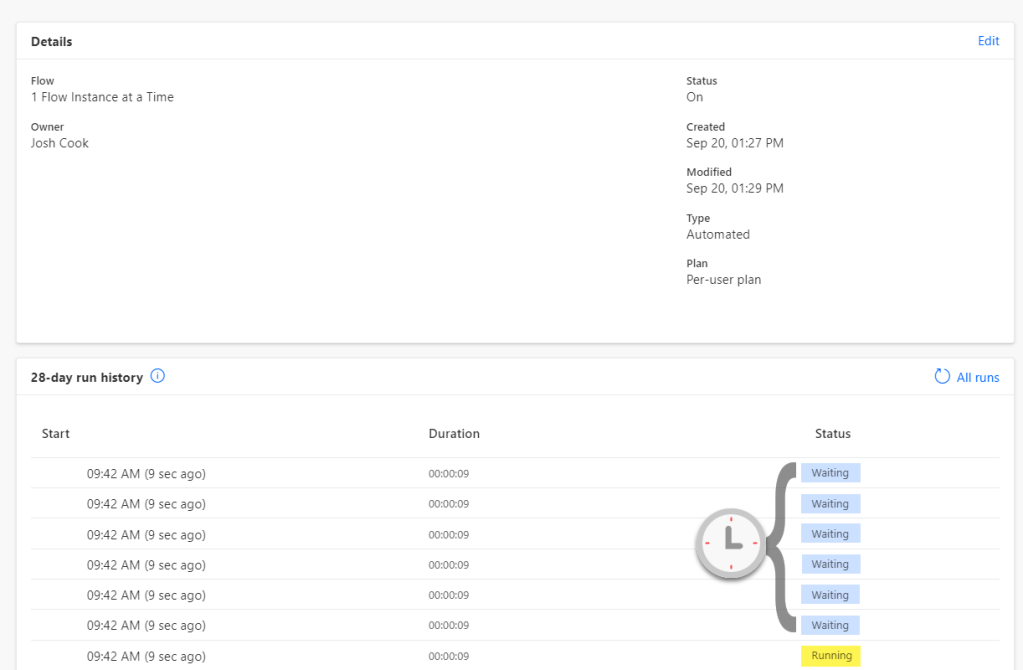
My trigger is When an item is created, so I will create 3 items, one every 15 seconds to show what happens with queued runs. 1st item = Run1 2nd item = Run2 3rd item = Run3
Here are my findings:
As we can see the runs are not in order, of the way I created the items. So we can conclude that if we create the items faster than our trigger time, we can expect that the Flow will not run in a sequential order.
Conclusion
As we can see above, this Trigger setting is very useful when needing to limit the Flow to run one at a time. But the limitation on this is, if the Flow is being triggered multiple times and having the runs queue up, there is a chance that the runs will not run in order.
In this post, I wanted to share some of the tips and tricks that I have learnt and came across. Some of these tips I will cover the basic fundamentals so you can start using them to help you build you Flows with less pain and more fun!
1. Compose
Compose actions, are one of my favorite actions to use. They are so robust and can display pretty much anything. Compose can be found under Data Operation > Compose
1.1
Add a Compose action before a Condition to check what values are being evaluated. In this example, my condition is saying: If length of value is greater than 0 I add a Compose action before the condition, with the same value I am using in the condition. This allows me to check the run and see the value being evaluated Example:
1.2
If Flow is spitting out errors about a wrong data type or you keep getting unexpected values – Since Compose can hold just about any data type. We can add one and check what the value is in run history.
1.3
Compose actions are great for doing expressions – We can add a Compose action and do expressions in the input, instead of writing the expression directly inside another action. This is handy if you need to do multiple expressions, or error checking.
2. Meaningful Names
There is nothing worse than leaving the default names for all your actions. This can be confusing, which can cause errors which could have been avoidable. This tip is going off tip #1.
2.1
The picture below shows a bunch of Compose actions Left: Default names used – Makes it very hard to know which action is what Right: Custom names used – Changing the names to something meaningful allows actions to be easily found and referenced.
2.2
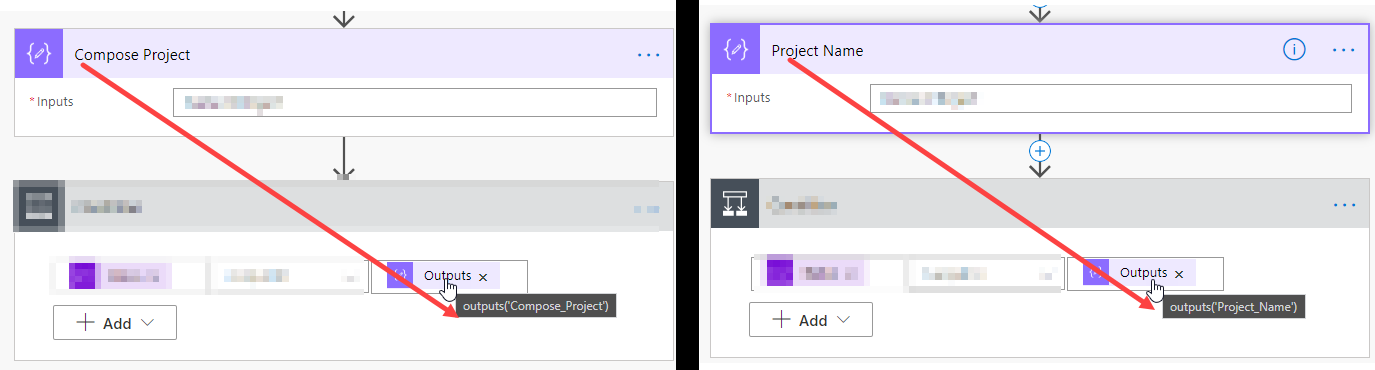
For awhile now, Power Automate has had a limitation with renaming actions that were being referenced in other places. That has since changed. We can now rename action that are being referenced in other actions! For example: The left picture shows the Compose action named ‘Compose Project’ and is being referenced by the condition below. Changing the Compose action name to ‘Project Name’ also changes the name in the referenced condition, which is shown in the right picture.
—–NOTE —– Limitations still exist.. The reference will not be updated if the action is in a expression OR inside a Loop. And will throw an error of: Template Validation Failed. So it is always best to rename actions right away —————
2.3
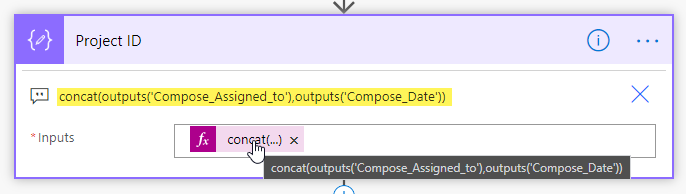
When using Expressions, to better understand and show others what is going on. Comments are great for this. For example, if using a complex expression I like to copy the expression and put into a comment of that action:
3. Scopes
Scopes are handy, they can be used for grouping actions together. In this guide I will show how to use scopes to group actions together. There are many advanced techniques that scopes can be used for, but for this demo I will be showing the very basics. Scopes can be found under Condition > Scope
I will add 2 scopes, one for Users, and one for Accounts To add actions in the scope, Click and Drag the action into the scope
Drag the actions in so the order of the actions remain the same. For example, I put the Scope above the List Records action so I could drag the List records in first than the For each loop next
This concept will help us in the following tips
4. Parallel Branches
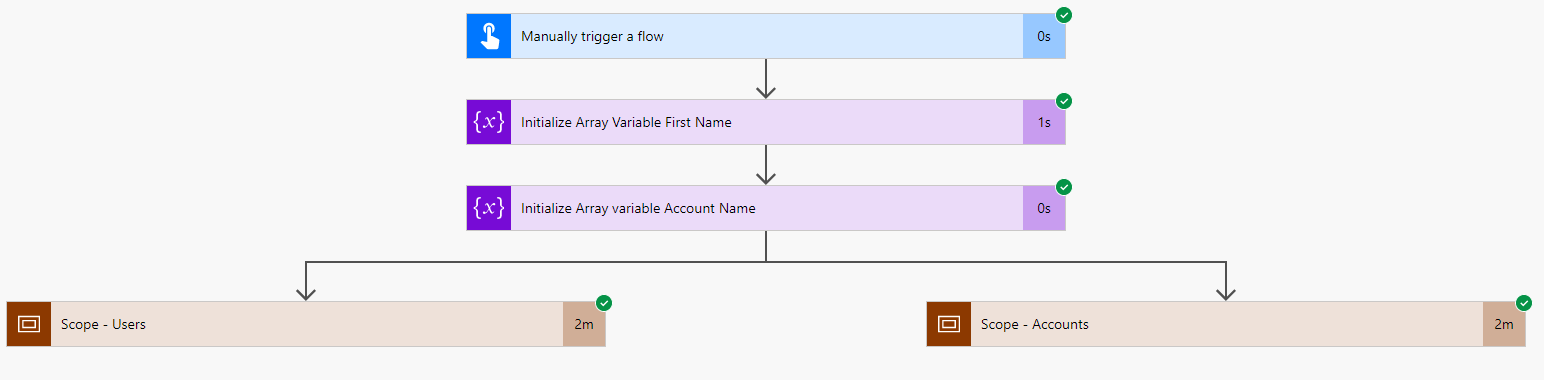
All Flows run from top to bottom in a single order fashion. If we split the actions to run side by side (parallel) This would drastically improve performance. In this scenario I have Two(2) CDS List records, and Two(2) Apply to each loops
List Records – Users Apply to each – To Append(add) all First names into a single variable List Records – Accounts Apply to each – To Append(add) all Account names to a single variable
Here is what the Flow looks like:
Running the Flow, we can see it takes about 4 minutes
Before we create a parallel branch we first must put the actions inside a Scope, this is to allow us to drag the actions around without getting the
This action cannot be dragged above actions it depends on. Error
Refer to Tip# 3 for details on Scopes
Now lets have these 2 different Scopes run in parallel branches First we want to click the ‘+’ icon where we want to add the branch, next click Add parallel branch
In this example, I am adding a parallel branch above both Scopes
Our screen will look like this:
Next we need to Click and Drag one of the scopes to the new branch
Once the Scope is in the branch we can click the X on the Choose an action tab
Now lets run thew Flow again: As the picture below shows, the Flow now only takes 2 minutes to run, cutting our run time by half, that’s insane!
Imagine our run normally taking 30 minutes, now only taking 15, just from a simple step
Tip# 5 will make our Flow run even faster!!
5. Concurrency
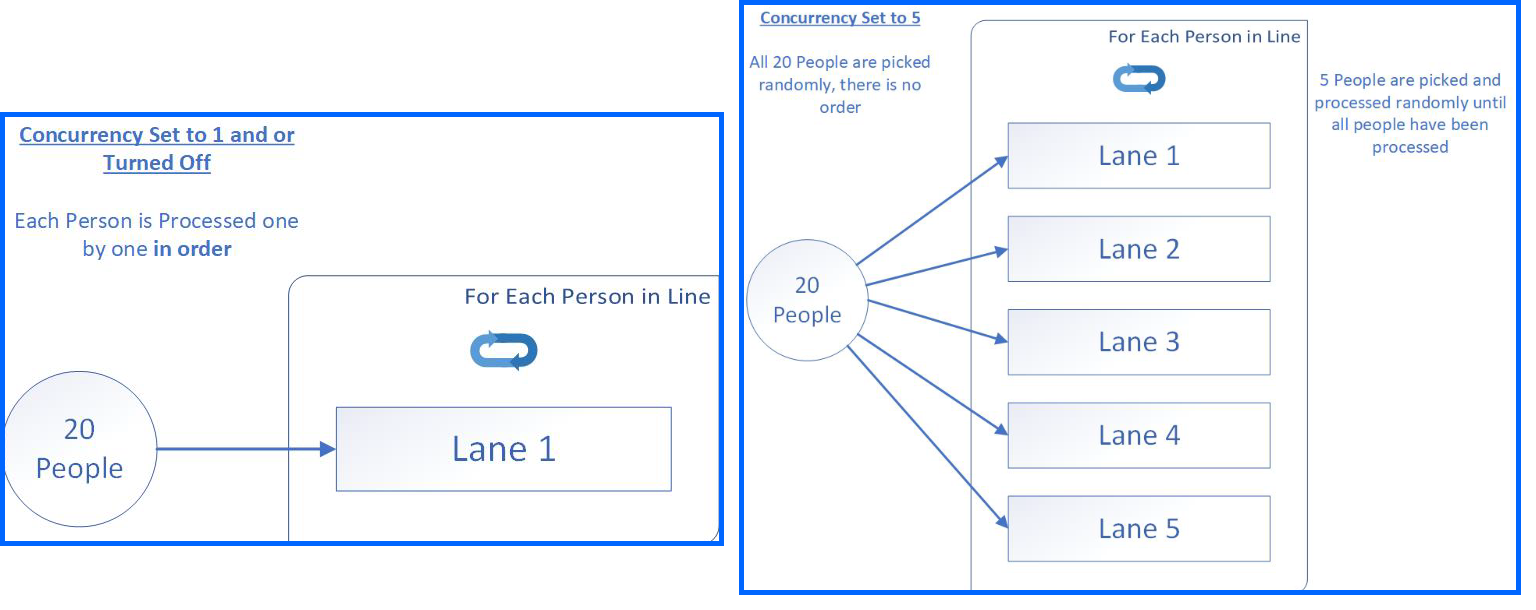
What is it? By default loops run one after another. Concurrency can make loops run in parallel. To better understand this, we can think about a grocery store. In this scenario:
People = Value that is going into Apply to each loop Lanes/Cashier = Concurrency Control Number
There are 20 people waiting in line at the store. There is 1 lane/cashier open. Since the cashier can only take one person at a time, this process can be lengthy. Now with Concurrency turned on, things are a bit different. Lets say we set Concurrency to 5. This means 5 lanes/cashiers will be open. This is great! But there is a catch..
When Concurrency is enabled, there is no more line. All 20 people are processed randomly.
Concurrency can be applied to all Apply to each loops — As well as Triggers!
To enable Concurrency:
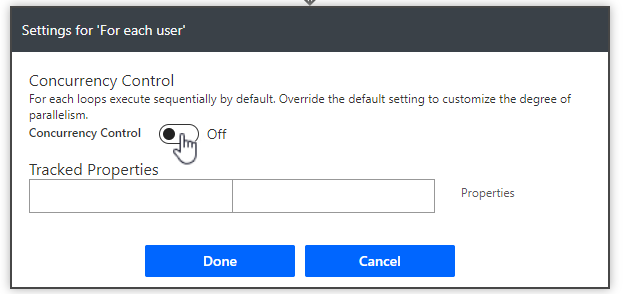
First, click the 3 dots on the Apply to each action Next, click settings
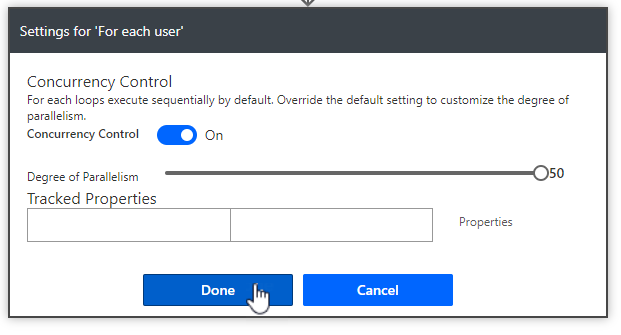
Next, choose the value for Concurrency and click Done
For this Demo, I am setting Concurrency to 50. Please be aware of API limit calls and 429 errors. If you get these errors while flow is running. Decrease the Degree of Parallelism
Now lets see this in action! I set Concurrency to 50 on both my Apply to each loops from the last Tip. As a recap, the last time we ran the Flow, it took 2 minutes to run.
Results: About 5 seconds!
The Run time is about 5 Seconds. Since we used a Parallel branch the total run time is the longest duration of our Parallel branches
This drastically improves performance.
Conclusion / Key Take Notes
Use a Compose action to check values and outputs, that you normally cannot see, Like in a If Condition
Compose actions can store almost any data type. When in doubt.. Use a Compose
When using expressions, try using them in a Compose, this can make troubleshooting much easier
Always use meaningful names for all your actions. Doing this will save loads of time later on, when needing to use dynamic content
Comment, comment, and more comments. All actions allow for comments. This will help support teams troubleshoot your Flow, as well as your future self, if you have to make any updates later on
When using expressions, copy the expression and paste into the actions comments section.
Use Scopes to group actions together.
To speed up performance, use parallel branches to enable actions to run side by side
Enable Concurrency control on Apply to each loops to drastically increase performance
Remember enabling Concurrency control randomizes the order the loop iterations run in. So if you’re expecting a certain order processing to happen, do not enable
These are some of the tips and tricks I wish I knew sooner. I hope at least one of these tips and ticks have helped someone. Thanks for reading!