
You may have run into an issue when creating Power Apps that needs to submit data to SharePoint, Dataverse, etc. But did not want to give everyone in the app access to these.
The problem is, Power Apps uses the connections of the user using the app, meaning if the app writes to a SharePoint List, the user will need Read/Write access.
The same goes for Power Automate if we try to send the data to Power Automate from Power Apps, it still uses the users connection who triggered the Flow.
How can we get around this? Read below!
Table of Contents
Known Issues
- If you block the HTTP Request connector via data loss prevention (DLP), child flows are also blocked because child flows are implemented using the HTTP connector. Work is underway to separate DLP enforcement for child flows so that they are treated like other cloud flows.
- You must create the parent flow and all child flows directly in the same solution. If you import a flow into a solution, you will get unexpected results.
Call Child Flows – Power Automate | Microsoft Docs
Prerequisites
- The Flows must be created inside the same Solution, so a Dataverse database must be configured on the Power Platform Environment
The Scenario
In this scenario, I will be showing how a user can use Power Apps to create items in a SharePoint List without being a member of the Site. This will allow us to use a specific Service Account to create the data in SharePoint without giving the user in the app any permission at all!
First we will build the Child Flow, then Parent Flow, and lastly customize the Power App
Child Flow
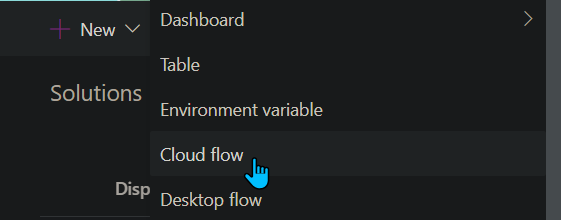
Inside your Solution create a new Cloud Flow.
- For our trigger we use a Manual Button, and add the data we are expecting from Power Apps to put inside our SharePoint List
(In my example I am only bringing in one field for Title) - Next, I add a Create Item action for my SharePoint List, and add the Parameters from the trigger inside the action.
- Lastly, I add a ‘Respond to PowerApp or flow’ action, I create an Output called Success, and some details about what was created.

Make sure to use the Connection you want users of the App to use for the SharePoint Create item action.
Save and go back to the Flow dashboard screen (where you see the Details and run history screen).
There will be a Card on the right side called ‘Run only users’ click Edit

Under Connections Used, switch ‘Provided by run-only user’ to the connection you want to be used by users of the App
(They wont have access to this Connection outside this Flow)

Click Save,
Now onto the Parent Flow
Parent Flow
Go back to the Solution and Create another Cloud Flow.
- For our trigger we use the PowerApps button trigger.
- As best practice, create Variables for your data that is coming from Power Apps. Don’t forget to name them, as this will be the parameter name in Power Apps,
Use the ‘Ask in PowerApps‘ dynamic content for your variable values. - Next we use a action called ‘Run a Child Flow’
(If you do not see this action, your Flow was not created inside a Solution)
Add the parameters (these were the input parameters from the last Flow that we just created). - Lastly, add ‘Respond to a PowerApp or flow’ action. For this demo I am adding the parameter ‘Success’ this is from the child Flow.

Click Save.
Power App
Now onto the Power App, I am going to create a simple Power App with 1 TextInput for Title, and a Button to Pass the data to Power Automate.
Here are my controls for reference:
TextInput_Title
Button_SendToFlow
For the Button:
1. Add the Flow to the button by clicking on the Button,
2. Clicking Action tab on top of page,
3. Clicking Power Automate
4. Select the Flow

Next add the parameters for the Flow, in my case I am adding the TextInput_Title.Text

Now, I want to add a Notification that the Item has been added, which will confirm my Flow has Run correctly. Ill be using the ‘Success’ Output parameter from the Flow for this.
To add this, I put my Flow run inside a Variable inside Power Apps. Ill call my variable Results, and IO add this to the OnSelect property of the Button where my Flow is:

Now I use the ‘Notify’ function to notify the user of the item being created, I add this after the semicolon. So my function looks like this in the end:

So my final code looks like this:
Set(
    Results,
    'PA-Trigger1'.Run(TextInput_Title.Text)
);
Notify(
    Results.success,
    NotificationType.Success
);
Reset(TextInput_Title)
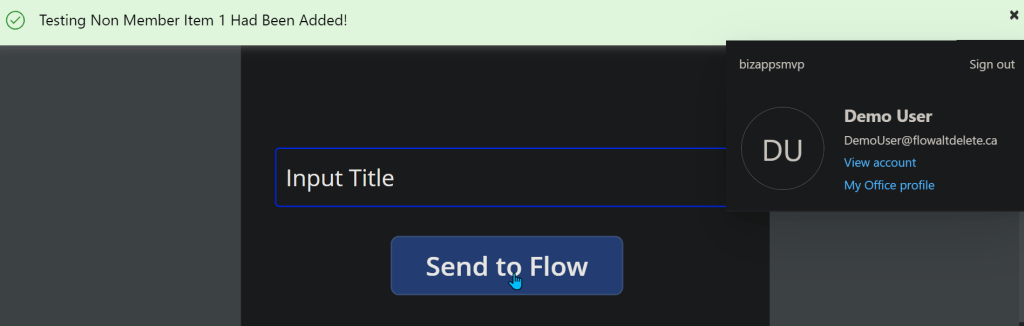
Now lets test it!
Conclusion
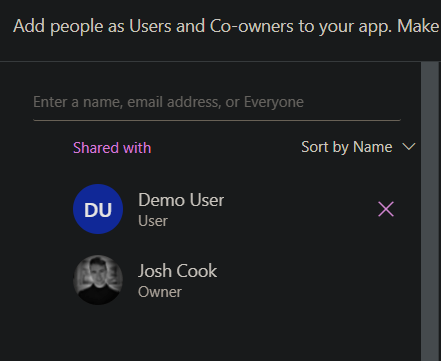
I am using a User called ‘Demo User’ I have shared the App with this user. But they are not part of the SharePoint Site
Here is the SharePoint Site:

Now Logged in as the Demo User to test this:

Button Clicked >
Now to check SharePoint >

Done!
So this was just a basic example on how we can create data inside a Data Source that the user of the App does not need access too.


