Where Are My Flows When Building Power Virtual Agents In Teams

You added a Flow in Power Virtual Agents in Teams, you now want to edit that Flow. Where is it? Come check out the answer!

Overview

Building Power Virtual Agents (PVA) in Microsoft Teams is fast, easy, fun, and powerful, especially when we add Power Automate to the mix. A couple questions come up:

1. After the bot is build, how do we edit the Flows? Do we have to go into the PVA bot inside of Microsoft Teams?

2. Where are the Flows stored?

The Answer

The answer to the above questions, can be simplified into one response.

All Flows built inside the Teams environment for PVA chatbots are stored in the Teams environment under the Default Solution.
Now.. How do we get there?

Navigate to the Power Automate Web Portal
Power Automate | Microsoft Power Platform

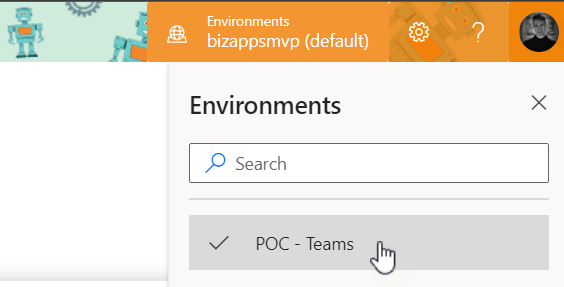
Sign in, and select the environments menu in the top right and choose the Environment that correlates to your Teams name where you built the Bot.
My Microsoft Team name is ‘POC – Teams

Next navigate to the Solutions tab on the left, and select ‘Default Solution


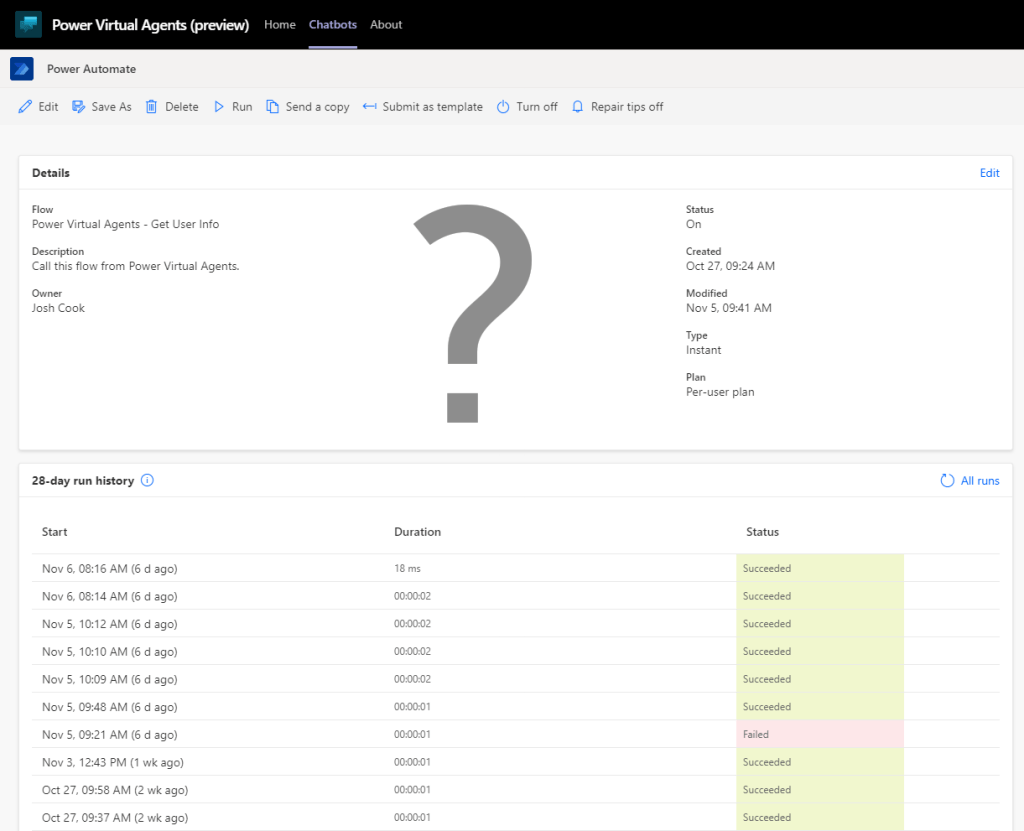
Once inside the ‘Default Solution‘ we can see many different types of artifacts. To narrow this list down:
On the top right of the page there is a dropdown with different types. Select ‘Flow

That’s it. Now we can see all the Flows inside this Teams Environment.

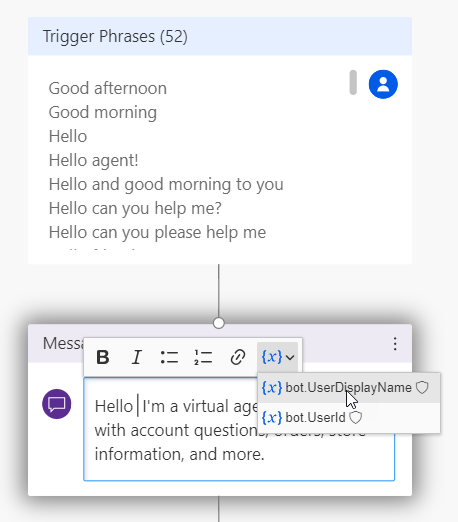
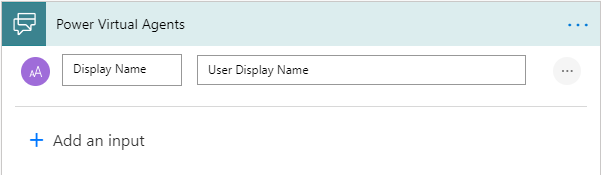
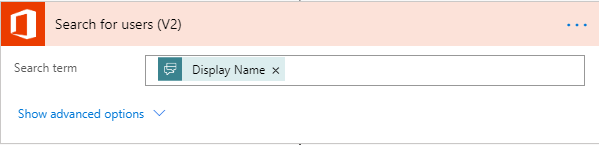
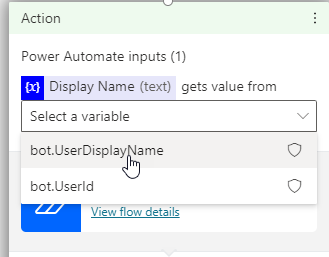
Want to learn how to get user info from Office365 to use in Power Virtual Agents? Check out my blog on the flow you see above
Get User Info

Limitations

There are some limitations:
– There is no way to import a Flow into this Environment

– When using the Save As feature, the Flow is saved outside of the Solution, thus cannot be used for your PVA Bot in Teams

– When modifying the Flows Inputs and Outputs you will have to remove the Flow action inside of PVA to properly refresh.

Conclusion

If you need help with anything Power Platform related, check out the community sites:

Power Virtual Agents Community – Power Platform Community (microsoft.com)

Power Automate community (microsoft.com)

Power Apps community (microsoft.com)

Home – Microsoft Power BI Community

Getting User Details To Use In Power Virtual Agents (Teams)

Lets use Power Automate inside Power Virtual Agents to get all the users details who is interacting with the bot. We can customize our greetings, or simply use any information that Office365 returns

Things to Know

This examples is based on building a Virtual Agent in Microsoft Teams.
We will be using the ‘Only for teams’ Authentication on the bot.

Summary

By default PVA in Teams has some valuable variables handy, like ‘bot.UserDisplayName‘. This is awesome, but what if we want more information about the logged in user?

This post will show both scenarios, on using the bot.UserDisplayName variable as well as getting all the user details that are stored in Office365 like:
– Email Address
– First Name
– Last Name
– Job Title
– Etc.

We can also use this in the Greetings Topic to address the user by their first name, rather than their display name. (Keep in mind this might affect performance by a couple seconds)

Contents

Bot Setup
Scenario 1 (Display Name)
Scenario 2 (Office365 Details)
Conclusion

Bot Setup

Once you have your Bot created, make sure the Authentication is set to ‘Only for teams’. To check click
Manage > Security, Authentication

For this example we will be using the ‘Only for Teams’ option. This will work for ‘Manual’ as well, but will require additional steps to setup a App Registration in Azure.

Select ‘Only for Teams’

Customize Greeting Scenario 1 (DisplayName)

After enabling the Authentication, you will now have access to Two variables,
bot.UserDisplayName
bot.UserId

Now lets customize our greeting.

Navigate to ‘Topics’ and select the ‘Greeting’ Topic, this is under ‘System Topics’. Click on the Authoring Canvas button.

Inside the message under the Trigger, you can customize the greeting message to include the variable bot.UserDisplayName

Testing this, the Bot now knows my Display Name. This variable can be used in any topic. Which gives the Bot more of a human type feel.

To get all the user details from Office365, scenario 2 will cover this

Customize Greeting Scenario 2 (Office365)

Navigate to ‘Topics’ and select the ‘Greeting’ Topic, this is under ‘System Topics’. Click on the Authoring Canvas button.


Under the ‘Trigger Phrases’ and select ‘Call an action’. We will now build a new Flow to get the user details we want.

You will now be navigated to a new screen where you will build your Flow.
Select the Basic PVA Flow Template

First give the Flow a meaningful name. Mine is:
Power Virtual Agents – Get User Info

Add a Text Input to pass in the Display Name variable

Next add a ‘Search for users‘ action from office365 connector, and pass in the PVA dynamic value from the trigger

Now we have all the user details. The results are returned as an Array. To get around this.
We can add a ‘Get user profile‘ action and pass in the first User Principal Name(UPN)

We have to use the first() expression, so we don’t get put into an Apply to each loop, my expression:

first(outputs('Search_for_users_(V2)')?['body/value'])?['UserPrincipalName']
@{first(outputs(‘Search_for_users_(V2)’)?[‘body/value’])?[‘UserPrincipalName’]}

Lastly in the Return values to PVA action, add all the values you want from ‘Get user profile‘ dynamic content

Click Save, and close on top right of the screen. Back at the PVA Canvas screen, add your Flow

Pass in the bot.UserDisplayName variable

Now we can customize our greeting to only address the user by first name

As a test I created a Topic called User Details

Conclusion

This can be a great way to give your bot more personality. Do keep in mind that this may affect performance.