Get the difference between two dates EASY

We have all been there, we need to check the difference between 2 dates, and if you ever had to implement this you would need to use some crazy mathematical equations using the ticks() expression. But now..

I’m not sure when this expression got added, but we can now use dateDifference() expression instead of using ticks().

The dateDifference() expression is a powerful tool in Power Automate and Logic Apps for calculating the difference between two dates.

Allowing to easily determine the number of days, months, or years between two dates, which can be useful in a variety of scenarios.

  1. Syntax and Parameters
  2. How to Use
  3. Extracting the Result
    1. Extracting Days
    2. Extracting Hours
    3. Extracting Minutes
    4. Extracting Seconds
  4. Things to Know
  5. Links

Syntax and Parameters

The syntax is easy with only 2 parameters:

dateDifference('<startDate>', '<endDate>')

How to Use

Below is a simple example of how to use this expression:

dateDifference('2015-02-08T10:30:00', '2018-07-30T14:45:30')

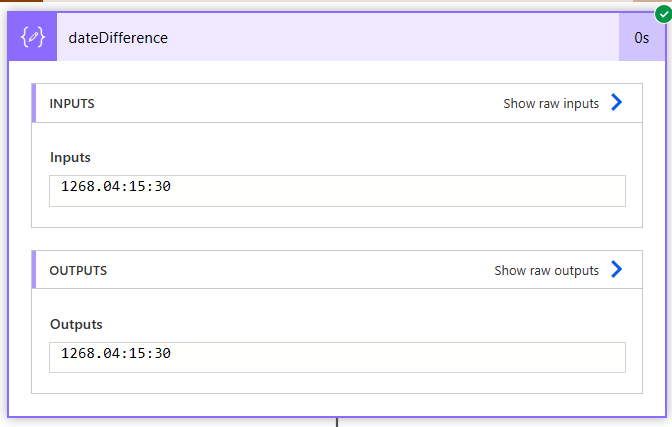
This returns

"1268.04:15:30"

The result is in the format of:
Days.Hours:Minutes:Seconds

Note:: If the dates passed in have no time interval, the result shows zeros for the hours, minutes, and seconds. We can extract the different parts of the return by using some expressions inside a Compose action, which we will do next.

Extracting the Result

If you need to extract certain parts of the result into the hours, minutes, or even seconds, you can use the split() expression.
Below you will find the explanation on the extraction, as well as the exact expressions to use.

  • The split() function splits the output of dateDifference() at the period (‘.’) into an array with two elements: days and the rest (hours:minutes:seconds).
  • The [0] indexer retrieves the first element of the array, which represents the number of days.
  • The int() function converts the days from a string to an integer.
  • Replace the date time values with your dates/time

Extracting Days

To extract the days from the result we can use

int(split(dateDifference('2015-02-08T10:30:00', '2018-07-30T14:45:30'), '.')[0])

This returns:

1268

Extracting Hours

To extract the hours interval from the result we can use

int(split(split(dateDifference('2015-02-08T10:30:00', '2018-07-30T14:45:30'), '.')[1], ':')[0])

This returns:

4

Extracting Minutes

To extract the minutes interval from the result we can use

int(split(split(dateDifference('2015-02-08T10:30:00', '2018-07-30T14:45:30'), '.')[1], ':')[1])

This returns:

15

Extracting Seconds

To extract the seconds interval from the result we can use

int(split(split(dateDifference('2015-02-08T10:30:00', '2018-07-30T14:45:30'), '.')[1], ':')[2])

This returns:

30

Things to Know

There are a few things to be aware of:

  • Be aware of time zones, Power Automate uses UTC as a baseline for all time formats.
  • If pulling dates from SharePoint be aware of what time zone your site is in.
  • You can convert the time zones by using expressions or by using actions. Read more about converting time zones here.

date Difference – Reference guide for expression functions – Azure Logic Apps | Microsoft Learn

Checking If HTML Table Is Empty In Power Automate

I needed to check if an HTML table had data or not. Usually when I need to check I have two expressions I like to use: ’empty()’ or ‘length()’.

The Problem

I needed to check if an HTML table had data or not. Usually when I need to check I have two expressions I go to first.

  1. empty()
  2. length()

I tried using empty() and found that the HTML table even when empty, is not truly empty.
I then tried length() and found that when the HTML table is empty there is still a length of 30.

The Scenario

I have some data that is used to track different devices that can be loaned out. The data has properties like, Type of device, Serial Number, Etc.

The data comes in, and looks like this:

[
  {
    "type": "Phone",
    "device": "iPhone 11 Pro",
    "serialNumber": "0007488"
  },
  {
    "type": "Phone",
    "device": "Samsung Galaxy S20",
    "serialNumber": "1166289"
  },
  {
    "type": "Watch",
    "device": "Apple Watch Series 5",
    "serialNumber": "00013701"
  },
  {
    "type": "Laptop/Tablet",
    "device": "Surface Pro X",
    "serialNumber": "AA78442"
  }
]

I want to put this array of data inside a HTML table and send it out on an email. The problem is, my data might be empty, as only available devices will show up in my data.

I need to check if the HTML table is empty, if it is empty:
If True:
Send email with HTML table
If False:
Send email without HTML table

The Flow

For this Flow, I will be using an Array Variable to simulate my data coming in from another system.
I will call this Variable ‘Data‘.
The HTML table action will be added underneath.
You will need to determine if you want to use ‘Custom columns‘ or ‘Automatic columns‘ This can be done in the advanced options in the HTML action:

My ‘Data‘ Variable is empty at the moment. This is what we want for our first run, we want to get the length of the HTML table when its empty.

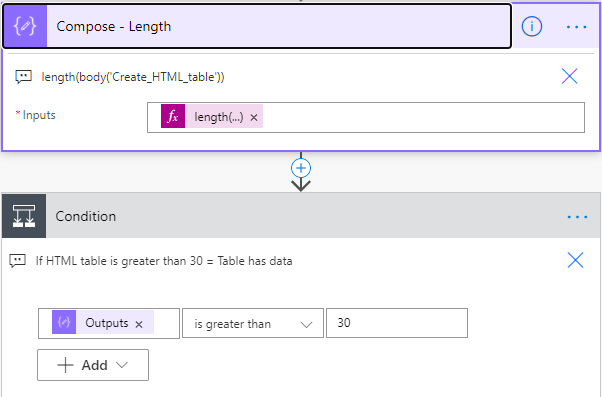
Next add a ‘Compose‘ action, and use the expression length(), pass in the HTML table as the parameter. For example, my expression looks like:

length(body('Create_HTML_table'))

Now run the Flow with no Data in the HTML table, and check your Compose action to see what the length is. In my case it is 30

Now we can add a If Condition to check if the length is greater than 30

** TIP **
I am passing in the Compose action into the condition, this allows me to see what the outputs of the Compose action before it gets evaluated inside the condition. This is extremely useful for troubleshooting

Conclusion

The Flow will go into the ‘If yes’ block if the HTML table has data

The Flow will go into the ‘If no’ block if the HTML table is empty

Of course checking the Data Variable itself for length could work way better. This example is mainly for data that can come in that could have loads of junk. For example:
An HTTP API could bring in no data, but still have other information attached like, headers, status code, version. In this case we can only do conditional checks on the HTML table, since our Data variable will always have something being passed in.

I used this method to help someone on the Community Forum, check it out here:
https://powerusers.microsoft.com/t5/Building-Flows/Create-a-Flow-with-Condition-that-does-not-send-email-when-list/m-p/721076/highlight/false#M98488

Converting Time Zones Easily In Power Automate

Did you know that Power Automate has a Date Time action that can easily convert, and format time zones in one action?
Why is this important? Power Automate natively uses UTC as its time zone, as well as most SharePoint sites. Using an action can be easier than using expressions.

Summary

Did you know that Power Automate has a Date Time action that can easily convert, and format time zones in one action?
Why is this important? Power Automate natively uses UTC as its time zone, as well as most SharePoint sites. Using an action can be easier than using expressions.

The Flow

In this example, we will want to get the current time (this will be in UTC since we will be using Power Automate) and converting the time to local time with a specific format.

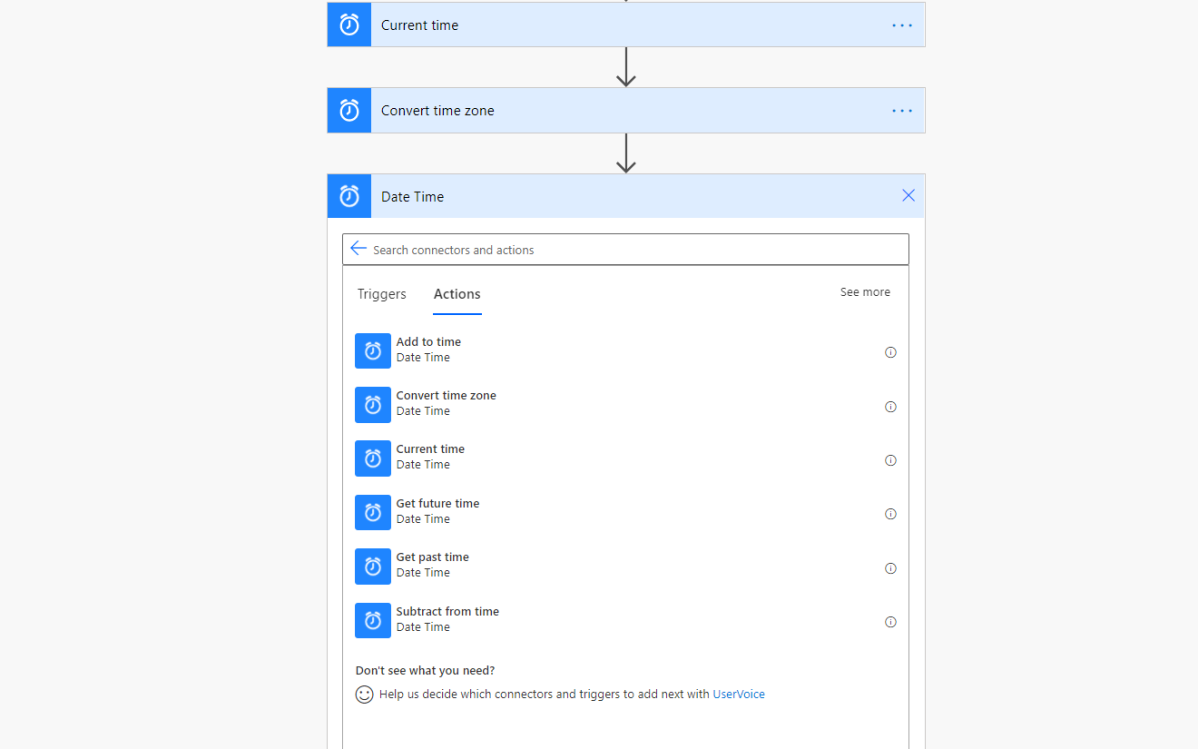
First we want to get the current time, we can use the expression utcNow() but I will be showing how to use the Date Time actions instead.

The actions are under Date Time:

Add a Current time action, this action is the same as using utcNow() expression

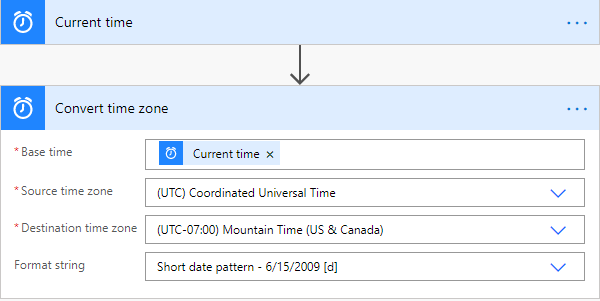
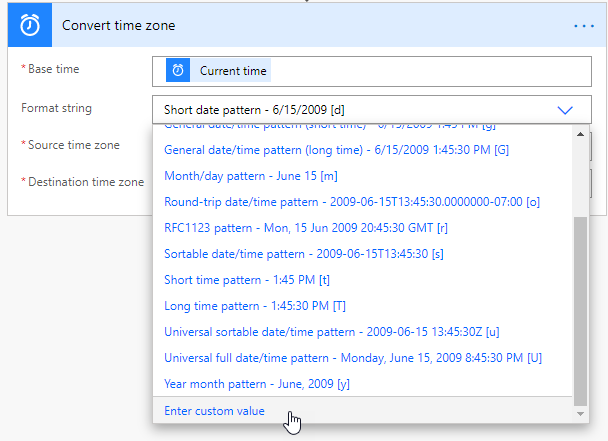
Next add Convert time zone action, this action is very useful as it has pre loaded time zones and formats to choose from.

The inputs for this action are:
Base time: Use the output from the Current time action
Source time zone: Make sure to select Coordinated Universal Time
Destination time zone: Select your local time zone or the time zone you want
Format string: This dropdown has many ISO formats to choose from. If you want to have a custom format, simply click the drop down and select Enter custom value. See below for examples

Format Examples

If for some reason the format you want is not in the dropdown for formats, you can create a custom format as long as it follows ISO 8601 format. To add a custom format click Enter custom value in the dropdown

Some tips when creating a format for the date ‘2020-10-13‘ (October 13 2020)
yy = 20
yyyy = 2020

MM = 10
MMM = Oct
MMMM = October

dd = 13
ddd = Tue
dddd = Tuesday

Examples:

yyyy-MMM-ddd = 2020-Oct-Tue
yy/MMMM/dddd = 20/October/Tuesday
dddd, MMMM, yyyy = Tuesday, October, 2020
MMMM dd, yyyy = October 13, 2020
yyyy-MM-dd = 2020-10-13 (used for comparing dates)

To add time to your format use the following in your format:
(It is best practice to add the letter ‘T’ before using time formats)

h = hours (12 hour time)
hh = hours (12 hour time)
HH = hours (24 hour time)
mm = minutes
ss = seconds
tt = Appends either AM or PM to time

Some examples are:
MMMM dd, yyyyThh:mm = October 13, 2020T12:51
MMMM/dd/yyyyTHH:mm:ss = October/13/2020T13:02:41
hh:mm:ss tt = 01:06:41 PM
h:mm:ss tt = 12:06:41 PM

Conclusion

Knowing these formats and the what each letter code does, the possibilities are endless. You can create any type of custom date time format easily.

As always if you have any questions, don’t hesitate to reach out.

Thank you for reading!